
There are two common ways to finish your knits: steaming and wet blocking. 99 times out of 100, we wet-block our knits, the other 1% we steam, and we never do nothing. This holds true for something as simple as a pair of garter stitch fingerless mitts, to a more complicated stranded colorwork sweater.
WHY WET BLOCK?
• Immersing your knits fills the fibers with water, opening them up to bloom. They become softer, and smoother.
• Wet blocking is washing: your finished object, no matter how yard you try, is dirty once you’ve bound off. Want more proof? The knitting I am working on right now has been on two airplane trips, at a hotel, out to dinner (twice), had an overnight on my couch in our t.v./play room (and who knows which animal used it as a bed), spent a day loose in my bag, and is now sitting on the front seat of my car. I’d be a fool not to want to wash it!
• Knitting is a continuous strand of yarn, and blocking evens it all out – it “takes” some length from where you knit too loose, and “gives” it to a place where you knit too tightly. (Do not take this to mean it fixes mistakes – it will not! – but it does make all of your stitches look even.)
• Stitch patterns such as lace and stranded colorwork need wet blocking to smooth out the stitches to show you the true nature of the design.


As you can see in the stockinette swatches above, my unblocked stockinette stitch swatch is basically a crumpled mess. The edges are curling dramatically, the fabric is barely useable, and I had a difficult time checking gauge. The blocked swatch, on the other hand, is crisp, neat, and the edges are staying put, making checking gauge a piece of cake. Additionally, all of the individual stitches are even and the same size/shape.

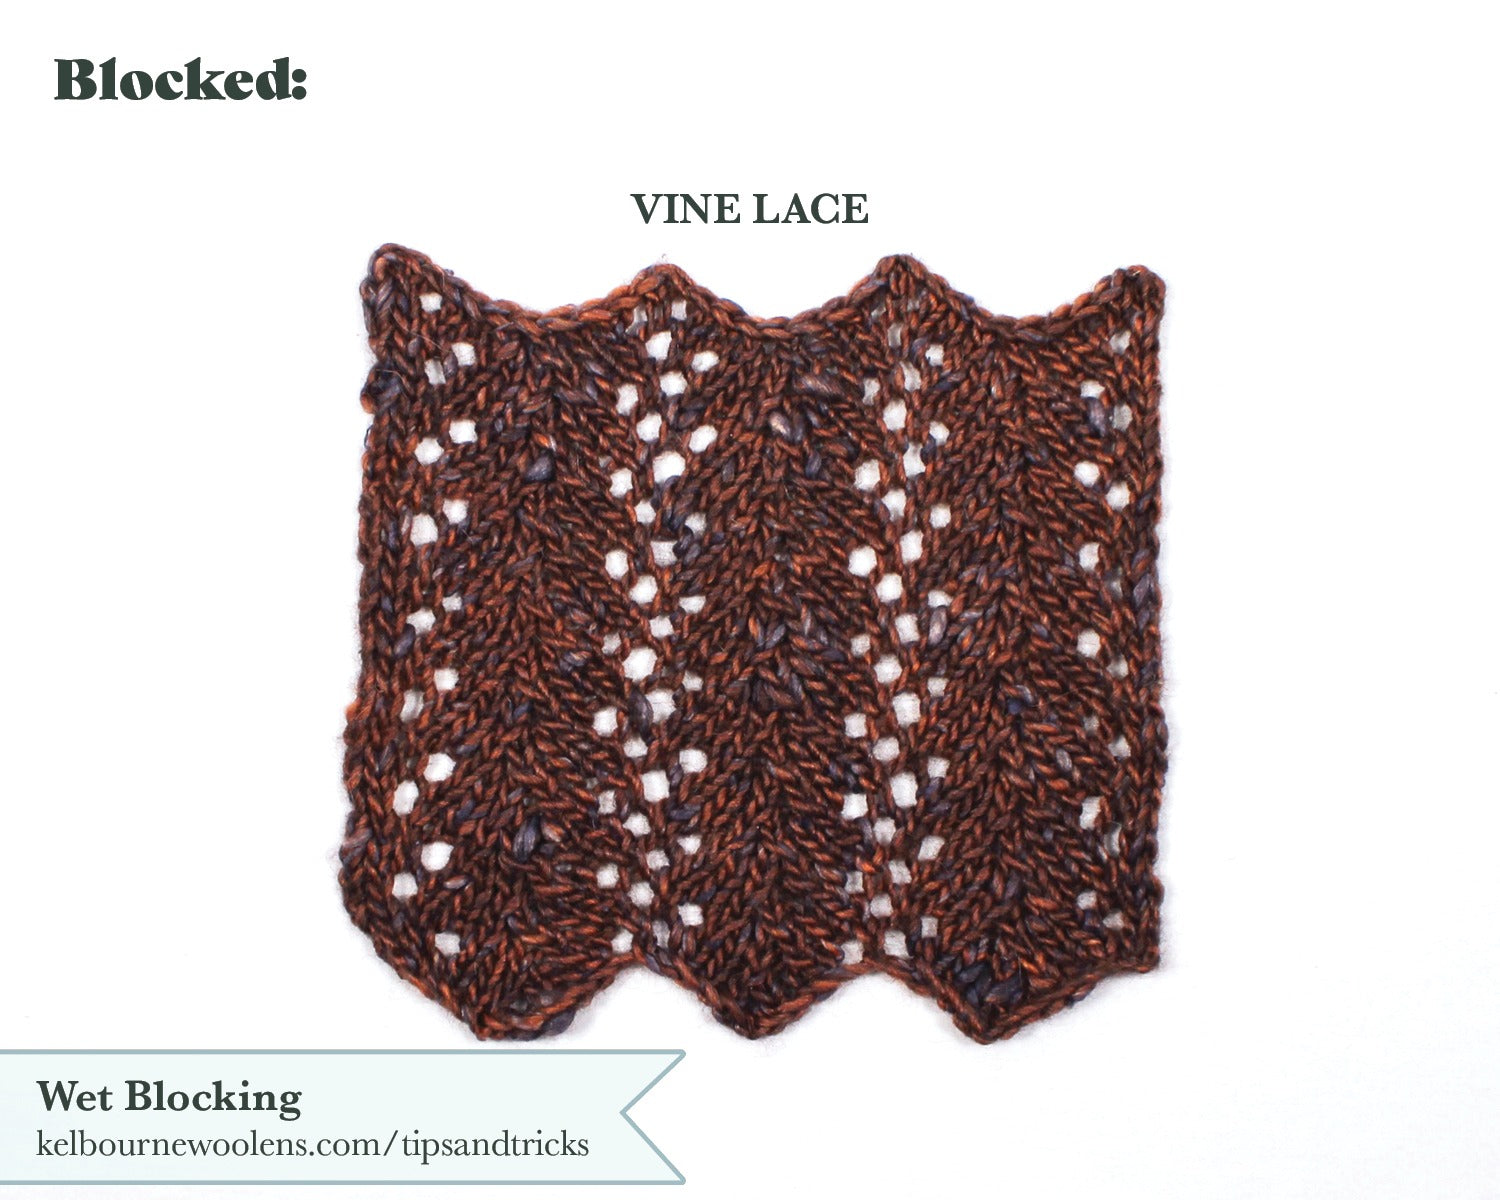
In the vine lace swatches above, while the unblocked swatch is better than the unblocked stockinette stitch swatch, it still doesn't look like a well-knit lace pattern. After blocking, though, the stitches open up dramatically, the columns (or vines) of lace are clear and well-defined, and the scallop edges are crisp and smooth. It is almost hard to believe they are the exact same swatch!
BLOCKED VS. UNBLOCKED GAUGE:
Stockinette Stitch:
• My unblocked gauge is 19 stitches and 26 rows over 4″.
• My blocked gauge is 19 stitches and 27 rows over 4″.
While the stitch gauge remained the same, the row gauge changed slightly. Not huge (just one small row over 4″), but if compounded over the length of a garment, my piece would be noticeably shorter.
Vine Lace:
• My unblocked gauge is 20 stitches and 22 rows over 4″.
• My blocked gauge is 18 stitches and 24 rows over 4″.
As expected, the lace changed more than the stockinette stitch swatch. As both the row and stitch gauge changed, my finished piece would come out much different if I did not take the blocked swatch into account.
How To Wet Block:
Materials:
• 1 towel
• wool wash – we, of course, recommend Soak!
• blocking surface: blocking board, blocking mats, or large towel.
• stainless steel pins
• tape measure
Directions:
• Begin by soaking your finished item in a sink full of cool water and woolwash. While the item is soaking, do not mess with it too much, letting it sit and soak is just fine!
• After it is well soaked, remove your finished knit from the sink and gently squeeze out as much water as you can. Do not twist or pull the fibers too much while they are still soaking wet.
• Lay a clean, dry towel out and lay your finished knit on it in the general shape of the item. Roll up the towel into a tube (or jelly roll) and by pressing down, squeeze out as much water as possible.
• Unroll the towel, and set it aside. Lay out your blocking surface where it will not be disturbed and your piece will have ample time to dry without having to move.
• Begin by laying out the piece in the general size/shape it should be. If you are knitting a swatch, pin it out, but do not tug it or mess with it too much, as your fabric should be able to behave in the way it wants to without too much effort on your part. If you are blocking a garment or accessory, use the given finished measurements in the pattern or on the schematic as a guide.
• Once pinned in place, let dry completely. Unpin your piece, seam if necessary, weave in any additional ends, and wear with pride!