I exclusively work cables without a cable needle for a few reasons:
1) I am notorious for never having notions. I use snippets of whatever yarn I’m working with for stitch markers, I don’t think I’ve met a darning needle I’ve used more than once, and I own about 10 tape measures but only know where one is at any given moment.
2) It is much, much faster.
There are a few things to keep in mind when cabling without a needle:
• This technique works best with smaller cables: 2, 4, and 6-stitch cables are great, 8 is an “at-your-own-risk” proposition.
• A sharp needle point is helpful, but not necessary.
• The more slippery the yarn and needle combination, the harder the technique will be.
Left Cross Cables:
Step 1 / Slide the first 2 stitches off of your left hand needle. Hold these stitches to the front of your work.
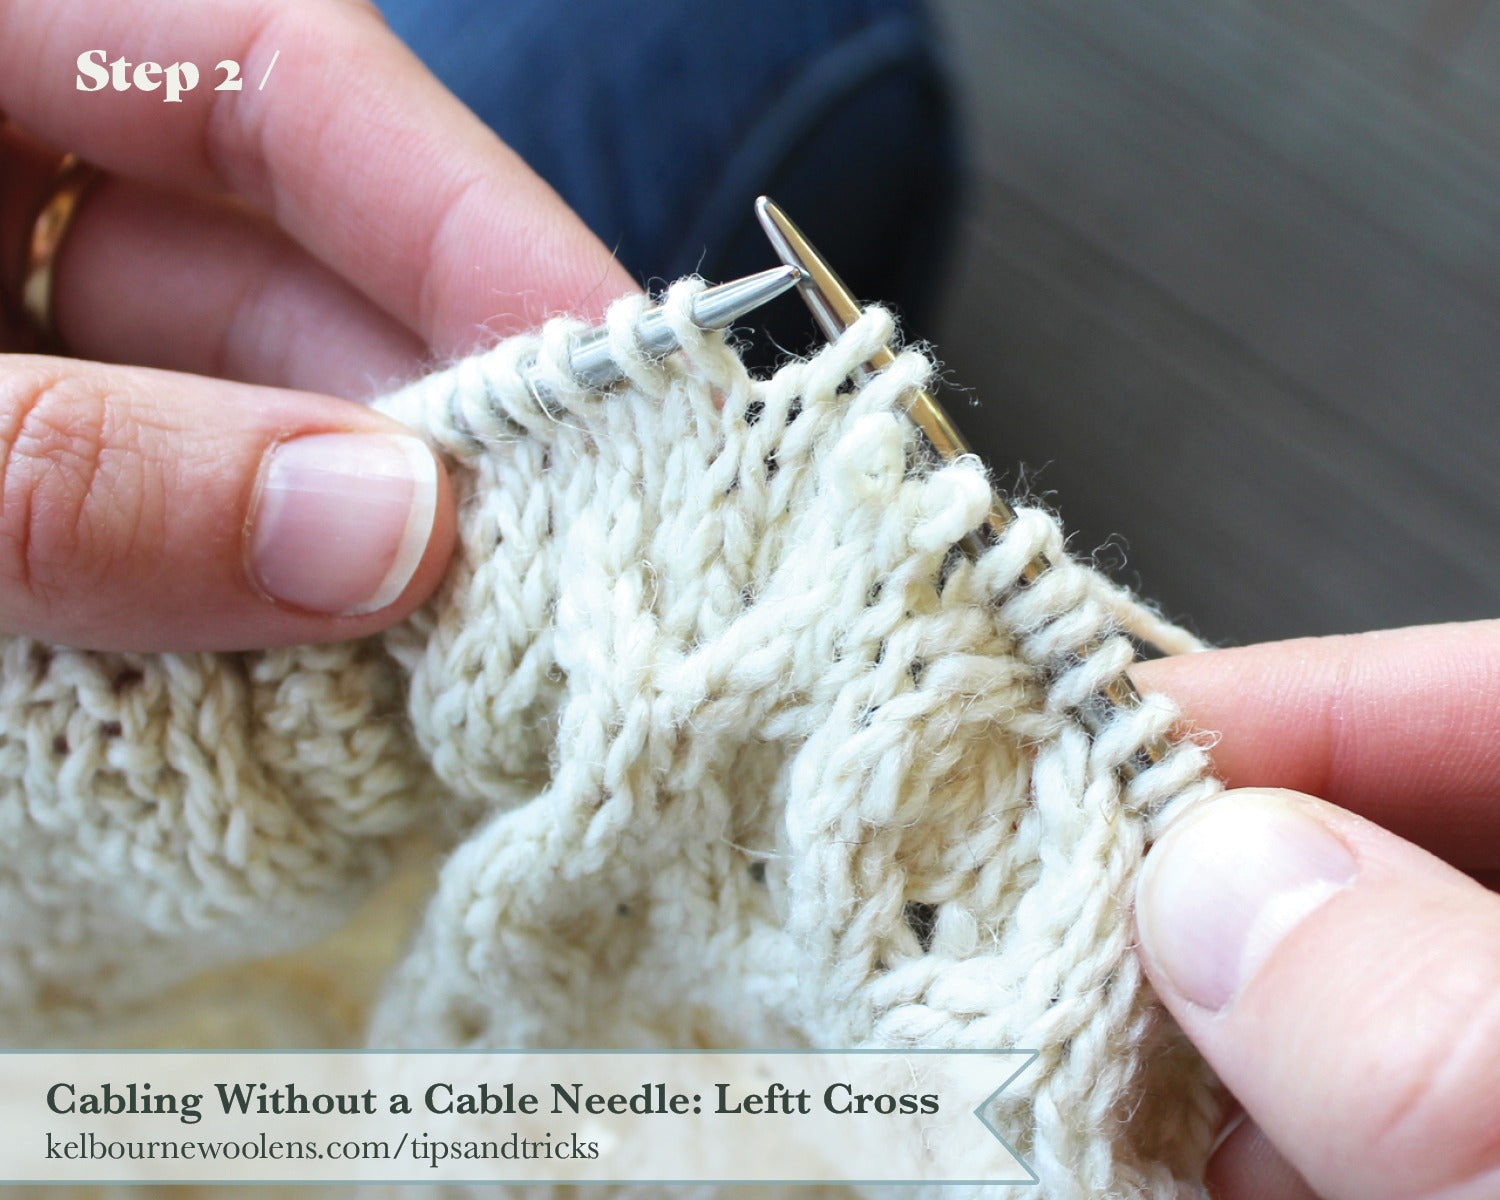
Step 2 / Slide the next 2 stitches off of your left hand needle onto your right hand needle.

Step 3 / Slide the 2 loose front-held stitches one at a time onto your left hand needle.

Step 4 / Slide the 2 stitches one at a time from your right hand needle to your left hand needle. You now have all 4 stitches of the cable on the left hand needle, pre-crossed in the correct cable stitch.

Step 5 / Knit all 4 stitches. You cable is complete!
Right Cross Cables:
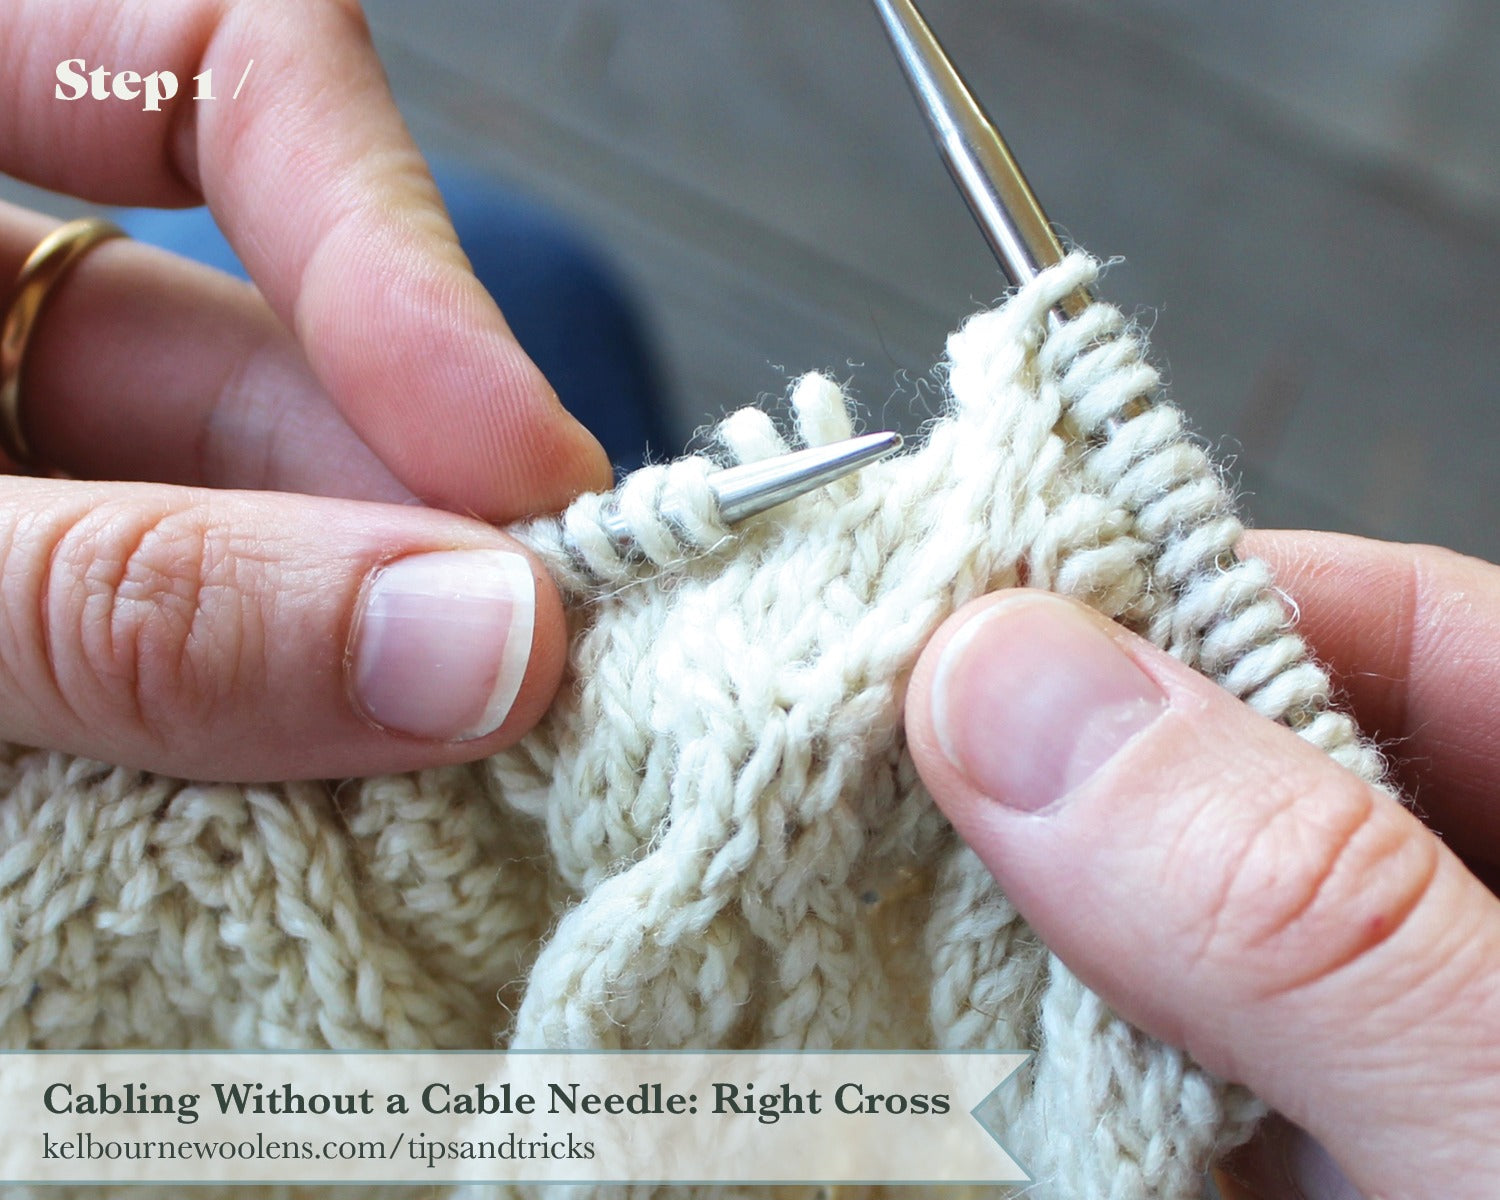
Step 1 / Slide the first 2 sts off of your LH needle. Hold these stitches to the back of your work.

Step 2 / Slide the next 2 sts off of your LH needle onto your RH needle.
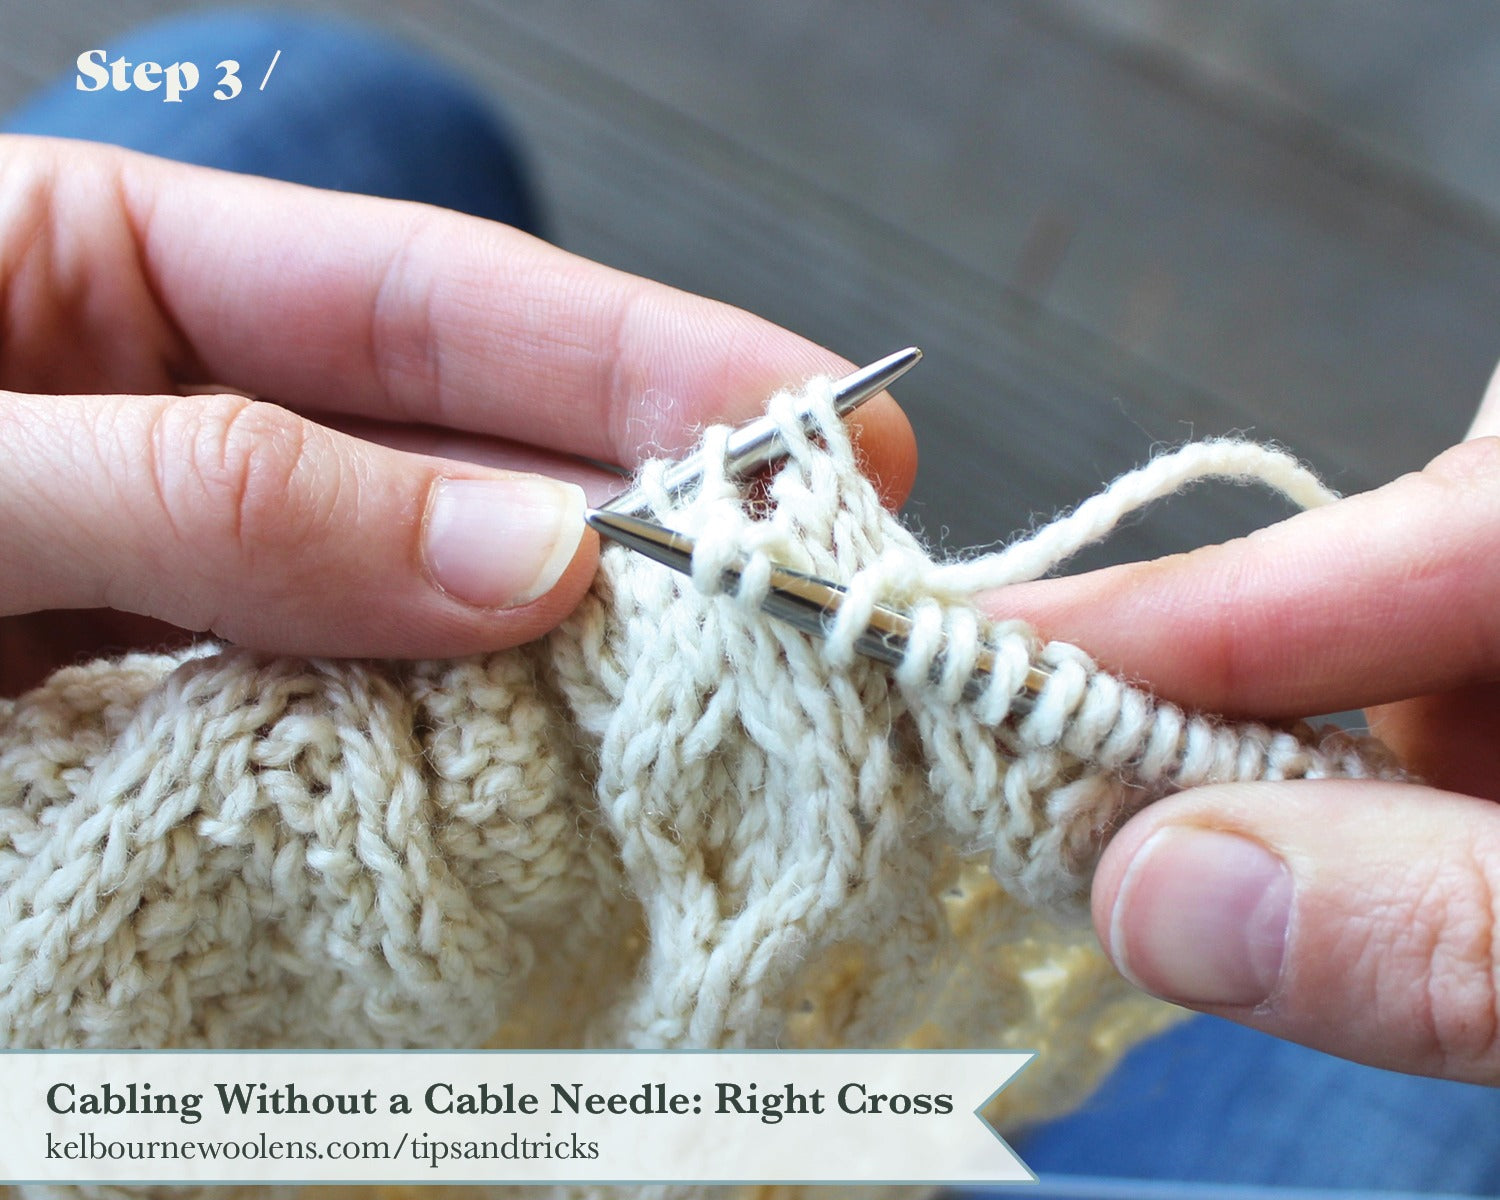
Step 3 / Slide the 2 loose back-held stitches one at a time onto your left hand needle.
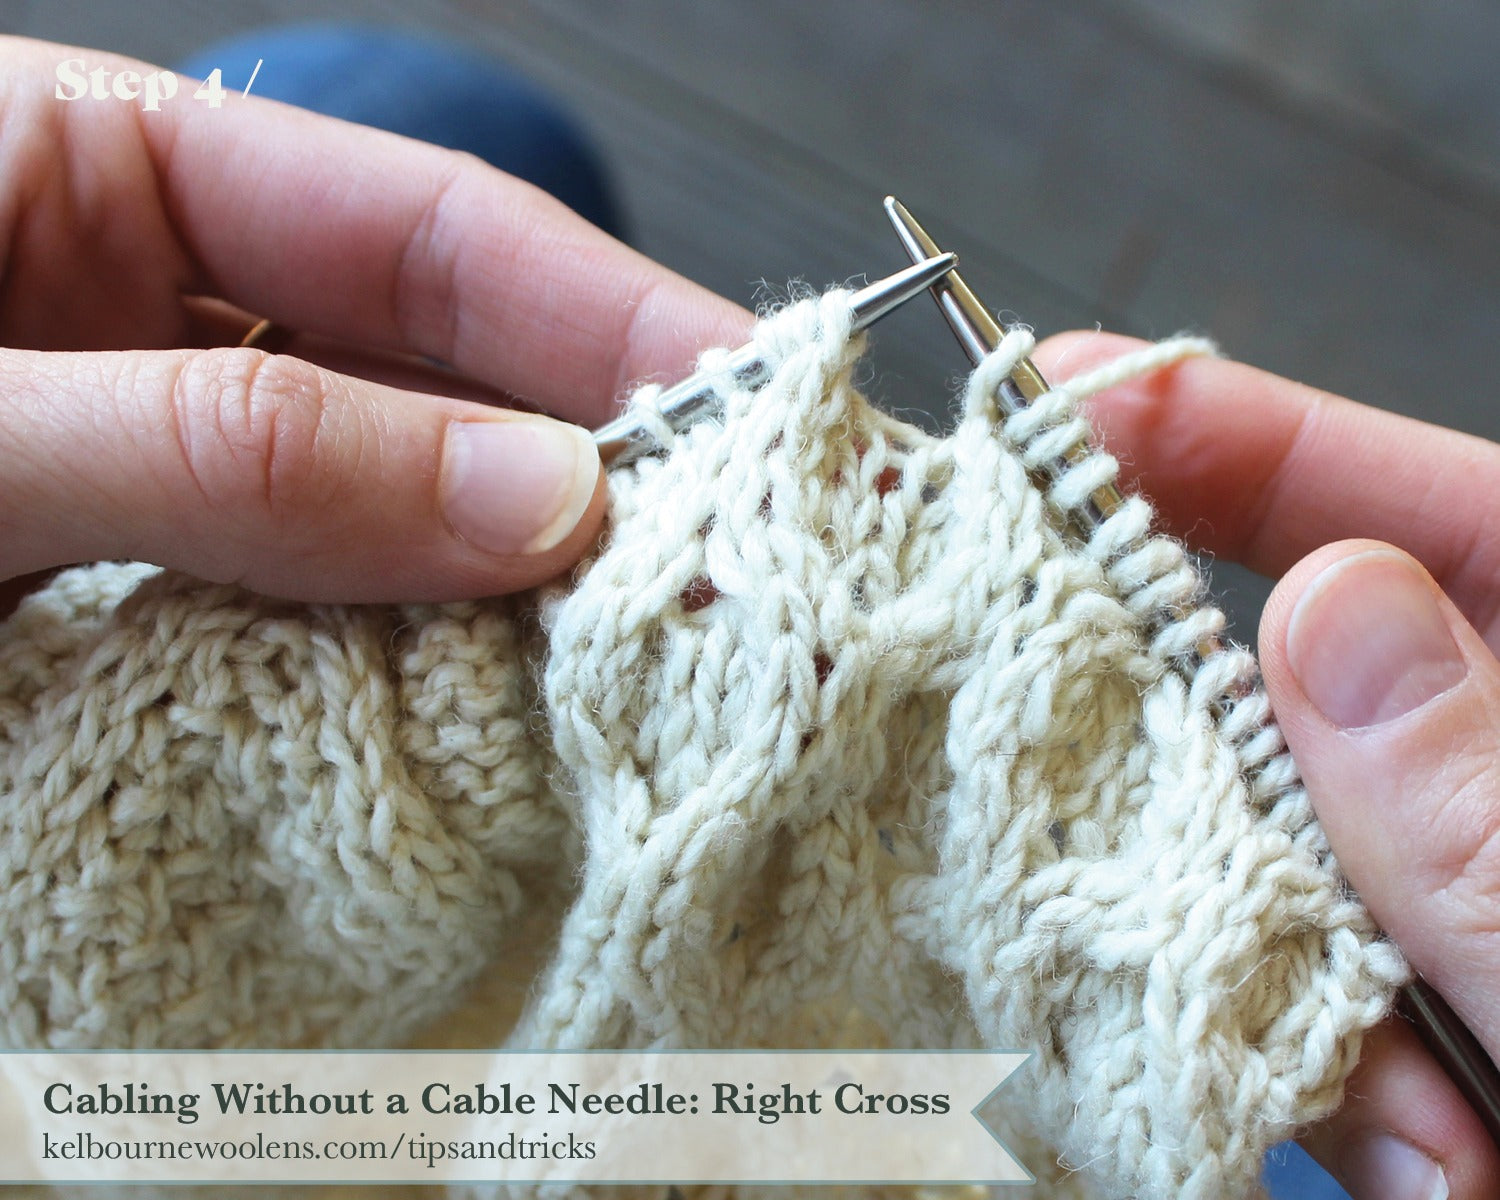
Step 4 / Slide the 2 sts one at a time from your right hand needle to your left hand needle. You now have all 4 stitches of the cable on the left hand needles, pre-crossed in the correct cable stitch.
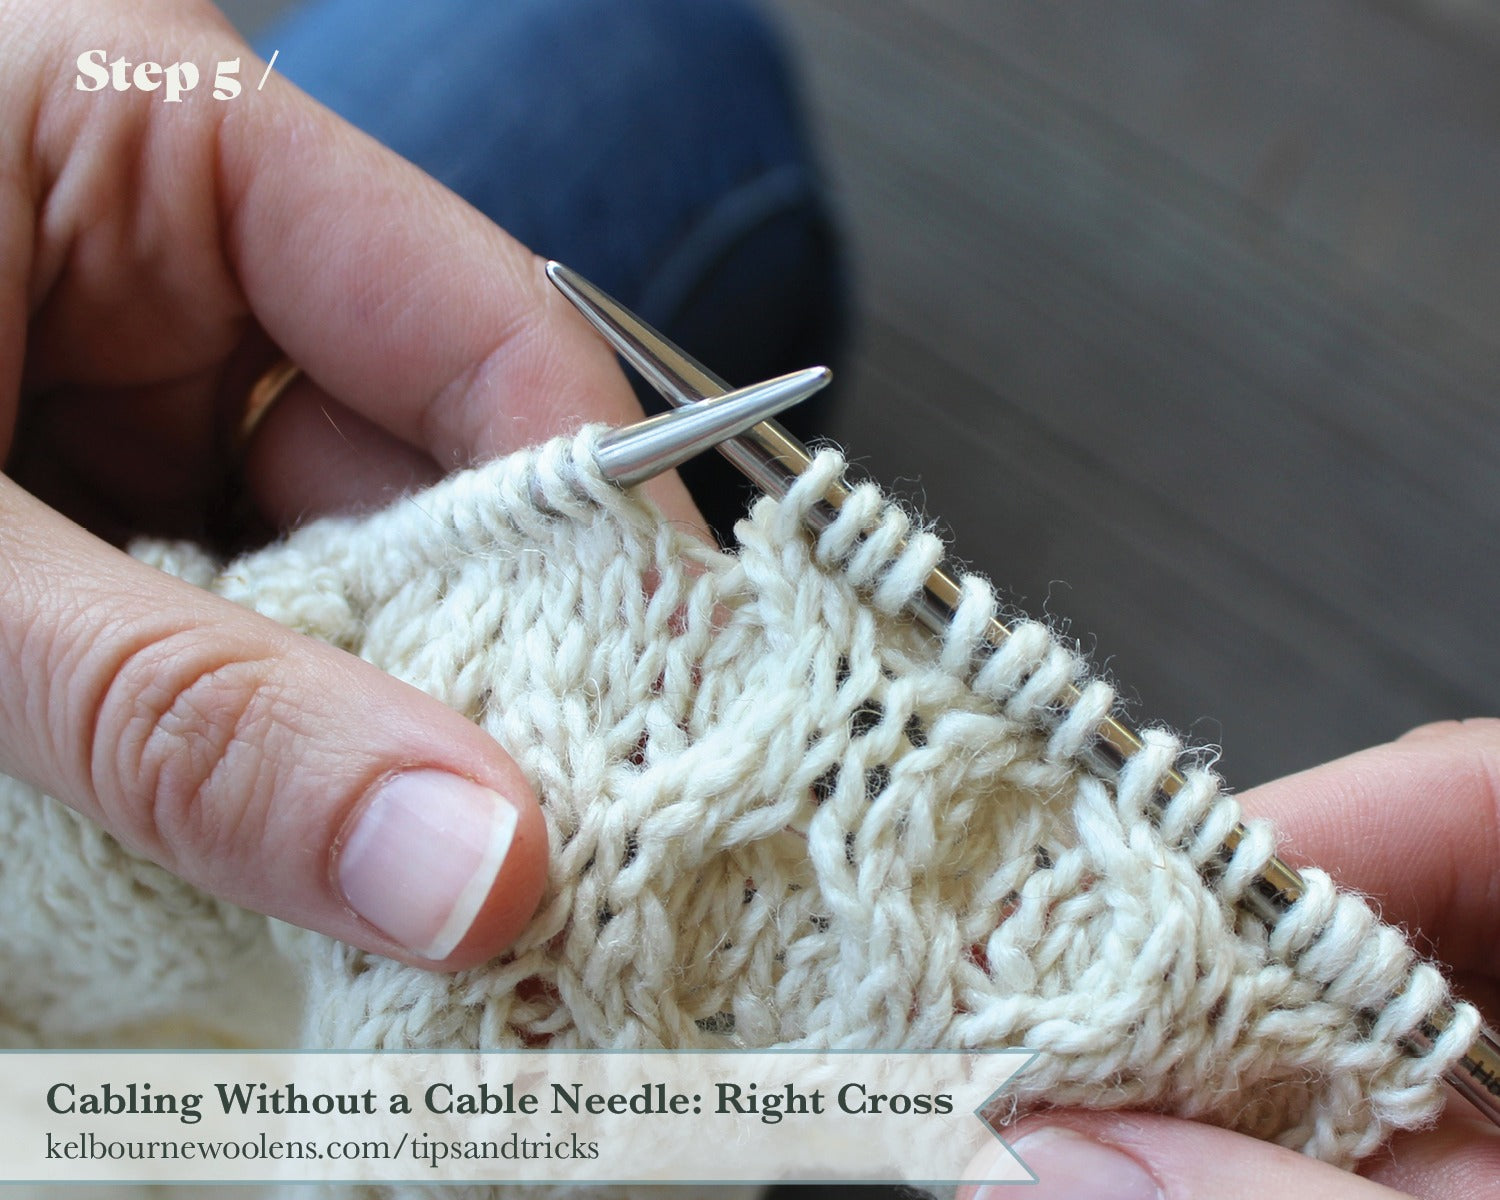
Step 5 / Knit all 4 stitches. You cable is complete!