
Granny Squares and crocheting go hand-in-hand. I haven’t met a crocheter (or knitter!) who doesn’t love them, and I am no exception. Granny squares were the first motif I learned how to crochet, and I always go back to them when messing around with a new project or idea.
The Granny Square Triangle is not a “new” invention of mine, but I loved the idea of combining a classic crochet technique with a modern yarn and updated shape, which is how the Asticou ce pattern came to be. I did change it up a bit – unlike the “classic” granny square, I opted to not work a single chain in between the double crochet clusters, and only 1 chain at the center points. The end result is a large triangular shawl in a little denser fabric, with a nice weight and hand.
Granny Square Triangle:
*Note: this tutorial expects you are familiar with basic crochet stitches such as Chain Stitches and Double Crochet. SET-UP /
STEP 1: Ch4.
*Note: When counting Chains, do not count the chain on your hook.
SET-UP /
STEP 2: Join with a slip stitch to form a ring. ROW 1 /
STEP 1: Ch3 (counts as 1 dc)
The Ch 3 will count as a DC when counting stitches. ROW 1/
STEP 2: 3 dc.
* The 3 dc paired with the Ch3 counts as a 4 DC cluster that makes up the edge of the triangle.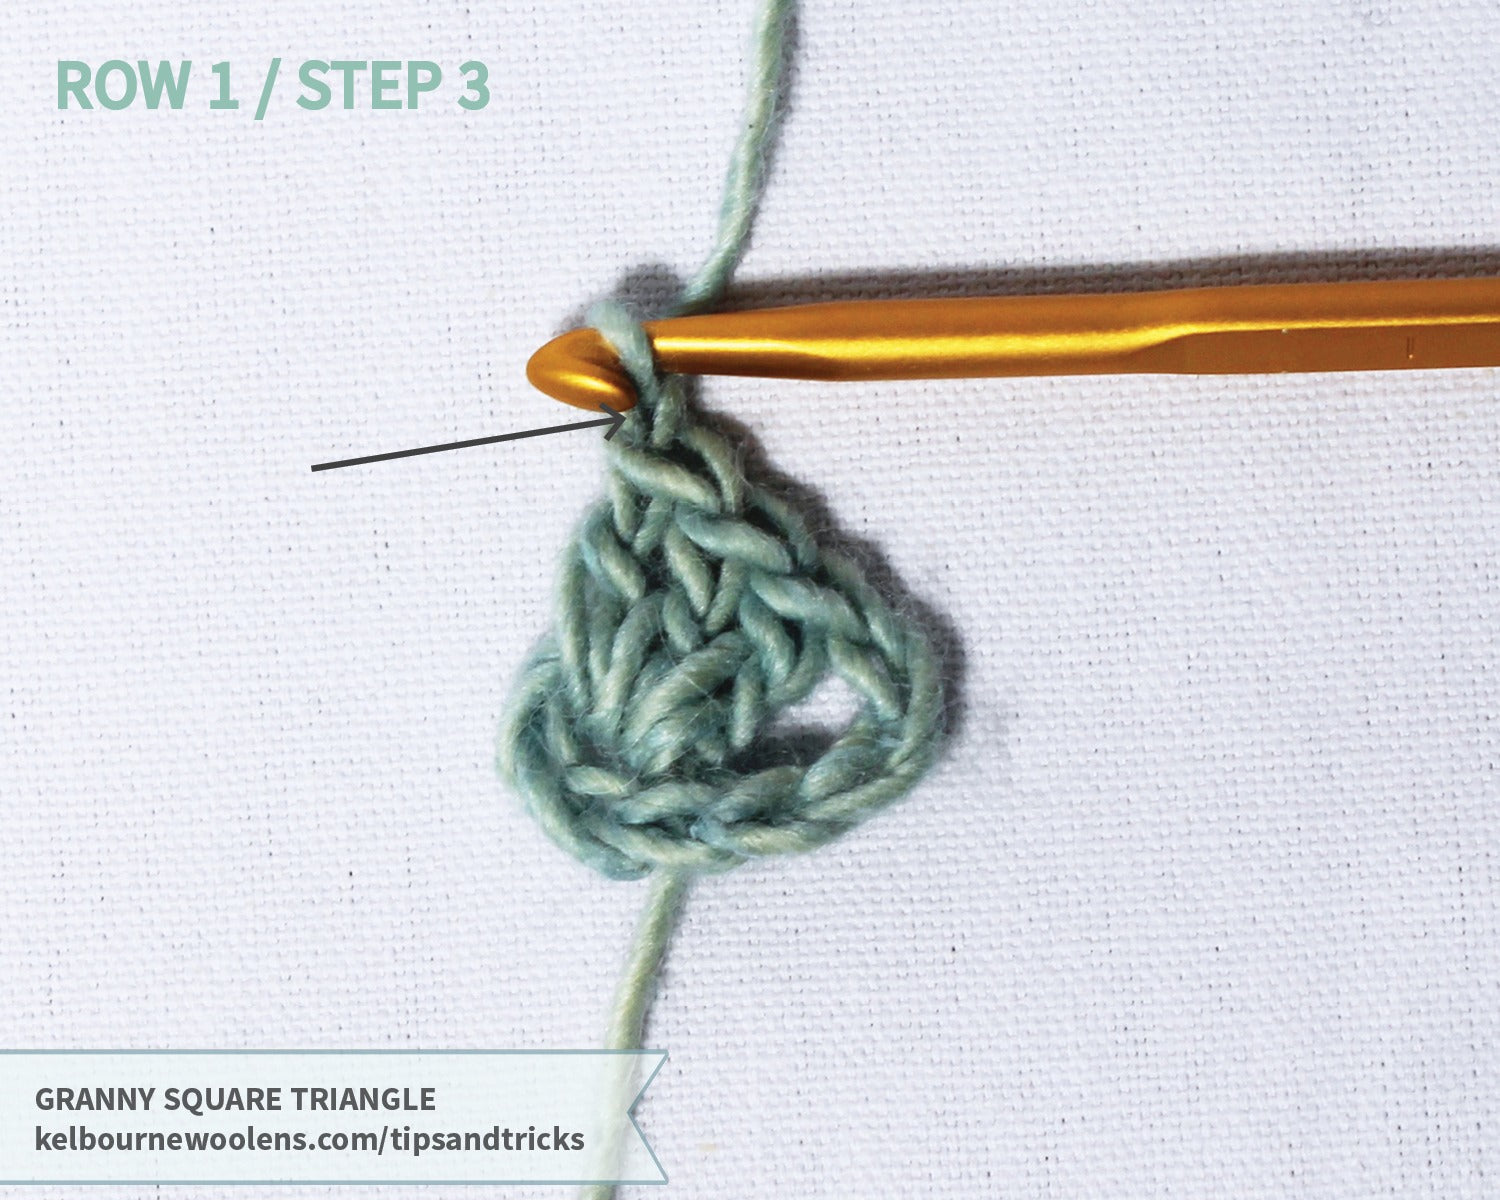 ROW 1 /
STEP 3: ch1.
* The Ch 1 is the center point of your shawl. ROW 1 /
STEP 4: 4 dc in ring.
* The 4 dc is the other edge of the shawl. ROW 2 /
STEP 1: Ch3 (counts as 1 dc)
• This is the first step of Row 2. Just as in Row 1, the Ch 3 will count as a dc when counting stitches. ROW 2 /
STEP 2: 3 dc in space between 1st and 2nd dc
Just as in Row 1, the 3 dc paired with the Ch 3 counts as a 4 dc cluster that makes up the edge of the triangle. ROW 2 /
STEP 3: (3 dc) in ch-1 space
This 3 dc forms one half of the center portion of the triangle.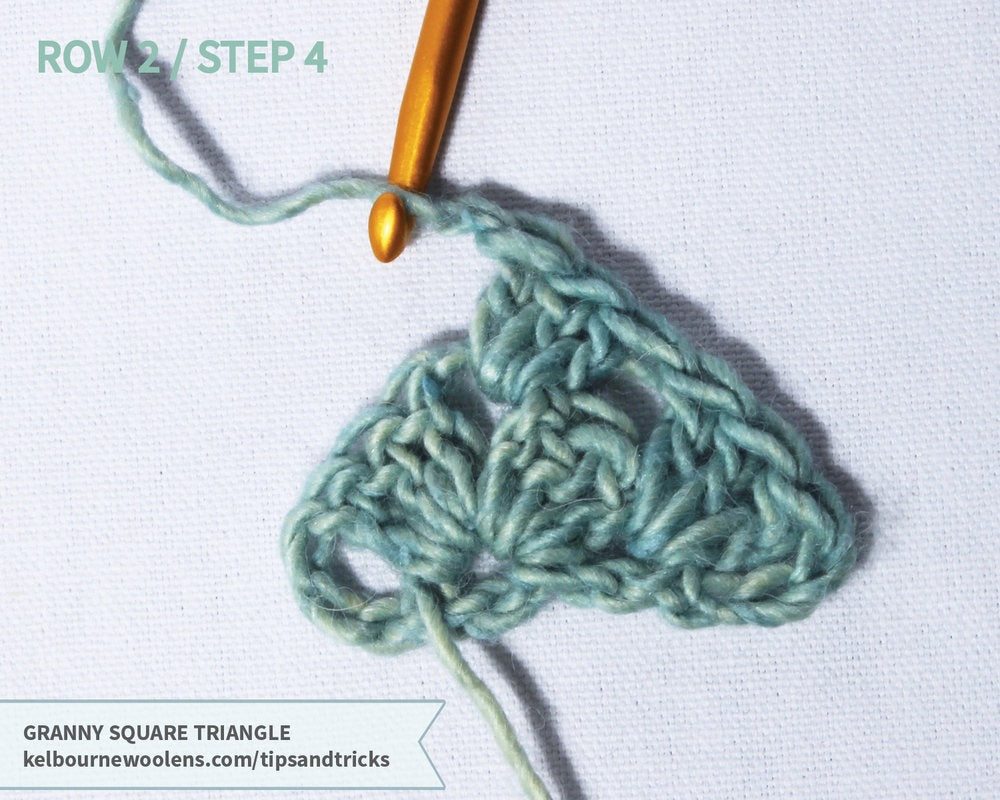 ROW 2 /
STEP 4: (ch1) in ch-1 space
Just as Row 1, the Ch 1 is the center point of your shawl. ROW 2 /
STEP 5: (3 dc) in ch-1 space
Just as in step 3, this 3 dc forms one half of the center portion of the triangle. ROW 2 /
STEP 6: 4 dc in space between last 2 dc.
*Just as in Row 1, the 4 dc is the other edge of the shawl.
ROW 3: Ch3 (counts as 1 dc), 3 dc in space between 1st and 2nd dc, 3 dc in space between 3dc of prev row, (3 dc, ch1, 3 dc) in ch-1 space, 3dc in space between 3 dc of prev row, 4 dc in space between last 2 dc.
When working Row 4, which is repeated throughout the remainder of the shawl, you will be repeating the “3 dc” along the shawl. Each row will increase the number of 3 dc clusters by 1. (Row 4 = 2 clusters, Row 5 = 3 clusters, etc.)