A provisional cast-on is a way to cast on stitches using waste yarn as a temporary cast on so that it can be easily unraveled after the knitting is complete, leaving you with live stitches which you can then place on your needle. I use the crochet provisional cast on often, most frequently when working hats with deep brims. The end result is a clean finish with a look as seamless on the inside as it is out.
There are a few quirks to the cast on, making it easy to trip up a bit and produce an end result that isn't exactly what you were looking for. They are all easy to avoid, though, and once you "get it", the technique is a worthwhile tool to have in your knitting arsenal. It is worth noting that there are a few ways to work a provisional cast on. I prefer - and exclusively use - the crochet provisional cast on, so that is what you will see detailed below.
MATERIALS: In addition to your working yarn and working needle(s), you will also need:
• Crochet hook of comparable gauge to your knitting needle*. When in doubt, err on the side of larger.
• Smooth waste yarn of comparable gauge and contrast color. Plied cellulose fibers are best; boucle, tweedy, or sticky (angora, high mohair content) blends are not.
• A knitting needle of the same size (or one smaller) than the working needle.
• A removable stitch marker.
Step 1 / To begin, using your waste yarn and crochet hook, chain the number of stitches to be cast on plus 5 or so. For my example, I am using a US 4 (3.5 mm) needle, so I am crocheting on a 4.00 mm hook. I want to cast on 96 stitches, so I am chaining about 102 stitches. *Yes, you don't really need a crochet hook for this, but knowing how to work a crochet chain is a worthwhile skill to possess.
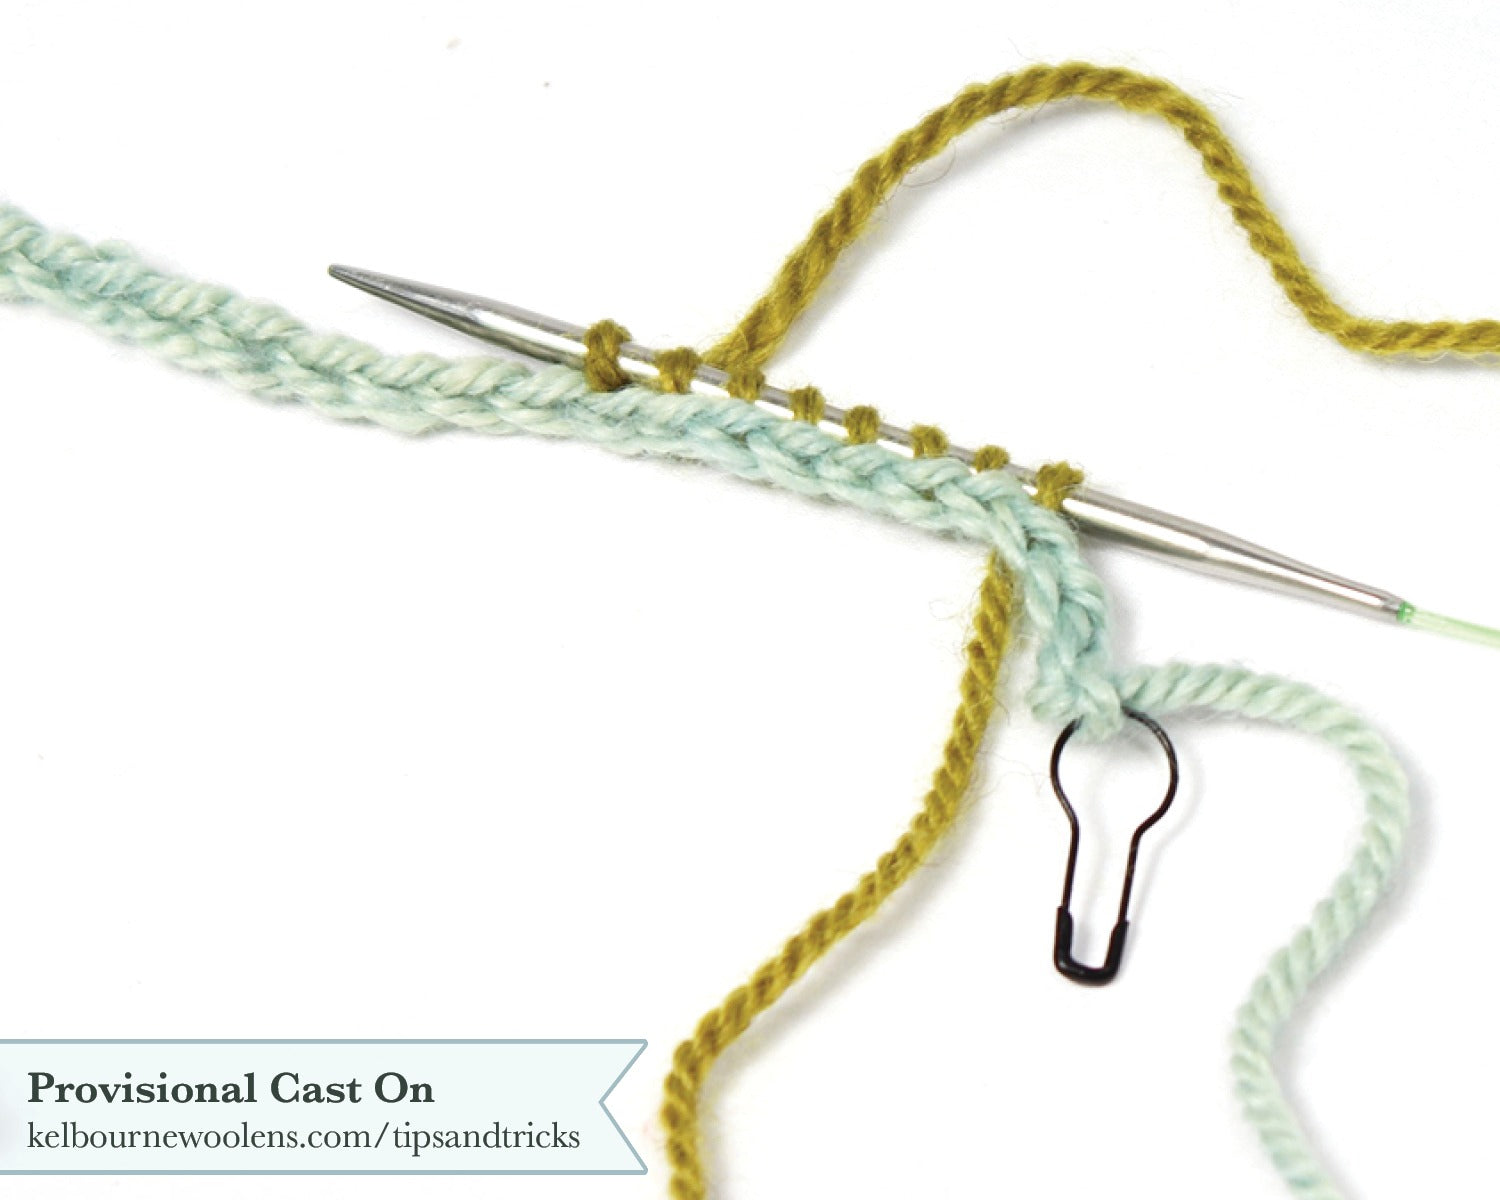
Step 2 / Once your chain is complete, cut the waste yarn, leaving a 3-4" tail, and fasten off the end. Mark the fastened-off end with a removable stitch marker. The marker denotes the end that you will be unzipping the chain from. Set your crochet hook aside.
Look closely at your crochet chain. You will see a side that looks like knit stitches (V), and a side that looks like purl stitches (--). In the image above, the left side shows the "knit" side, and the right side shows the "purl" side. You will be picking up the stitches in the “purl” side of the chain.
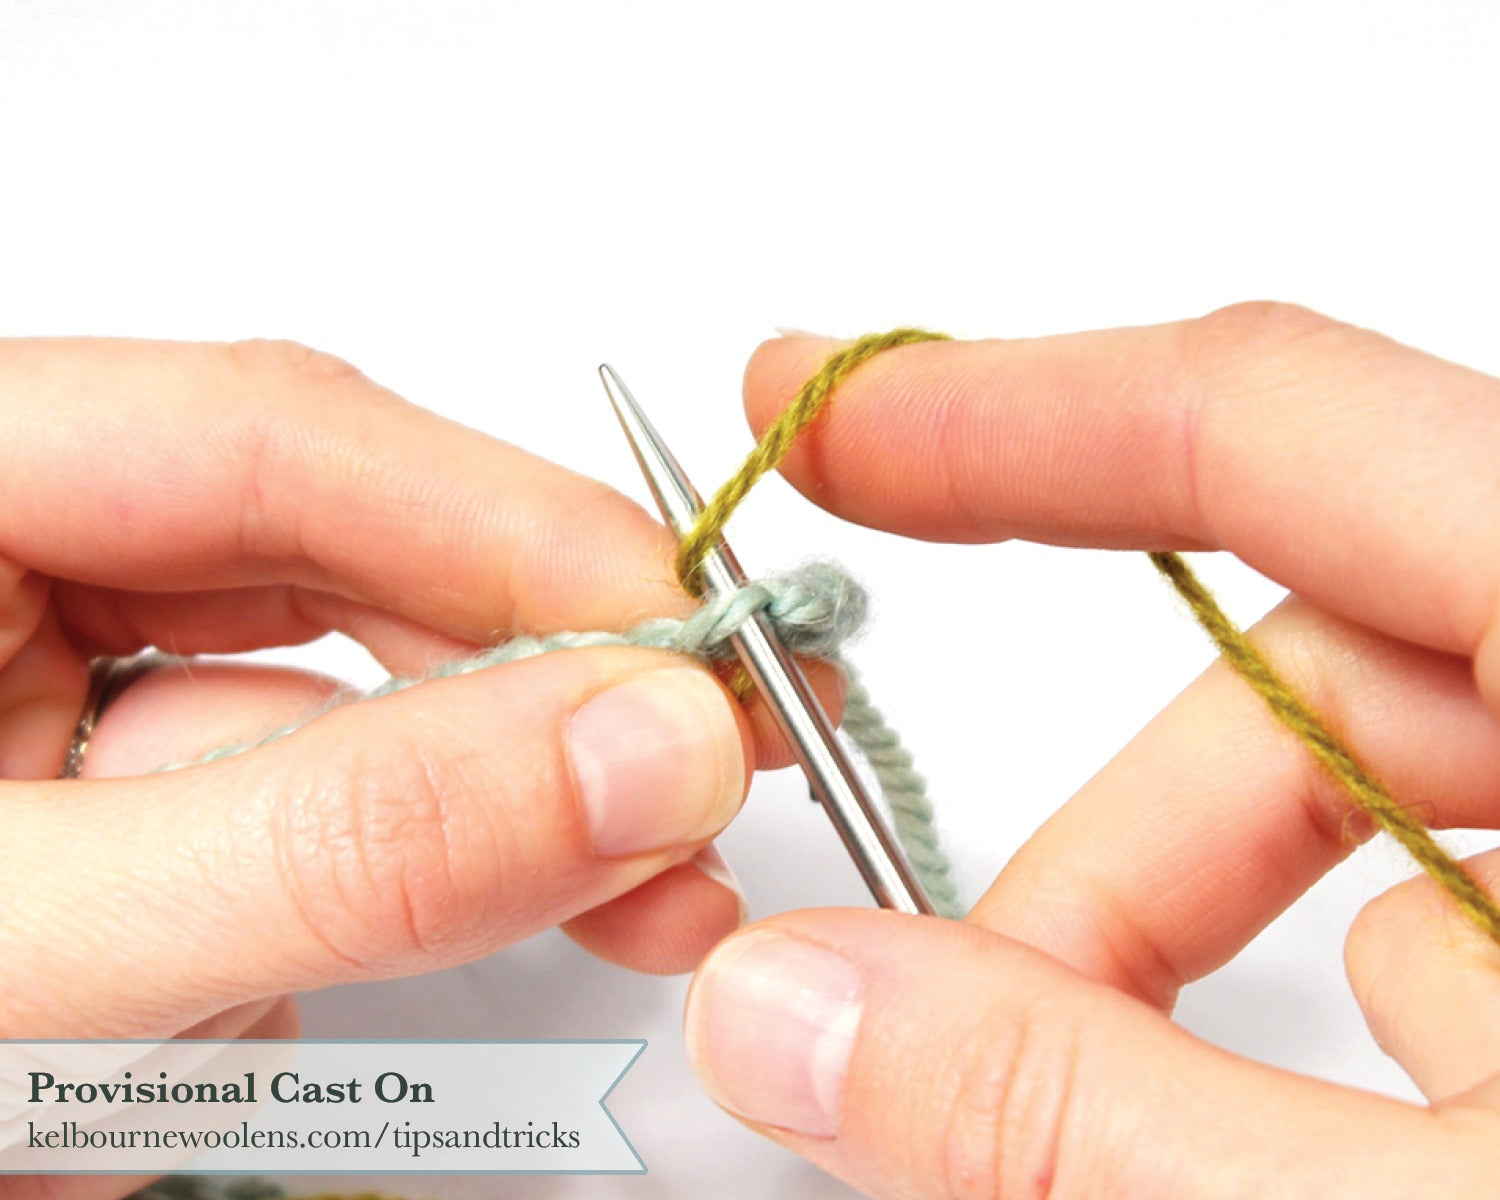
PICK UP Step 1 / Using your needle, and beginning at the end of the crochet chain with the stitch marker 2-3 stitches in from the end, insert the needle into the purl bump from front to back.
PICK UP Step 2 / Wrap your working yarn around the needle as if to knit. Bring the needle and working yarn through the chain - 1 stitch cast on.
Continue in this manner, picking up one stitch for every bump in your chain until the required number of stitches has been cast on. Once your cast-on is complete, you may join for working in the round, or begin working back and forth. If the pattern calls for working back and forth, once you turn the work, the purl side (typically the WS) of the fabric will be facing you. Once your knitting is complete, you will approach the live stitches from the CO in a few ways. You may either knit down, join the two sets of live stitches in some way using a
3-Needle Bind Off or via the
Kitchener Stitch, or in the case of the folded brim on hats such as Seathwaite, you will join the two sets of live stitches into one before continuing on with the body.