
Many knitting patterns have you pick up a specific number of stitches for button bands or other edges/facings. This is both a generous gift from the designer – they’ve done all of those pesky calculations for you! – but also leaves the potential for a wonky button band if you did not get both the exact stitch and row gauge in your swatch.
If you have achieved both row and stitch gauge as specified in the pattern, and it gives a specific number of stitches to pick up, and you have followed the pattern exactly, lucky you! You may pick up the stitches as specified and continue with your band. Many times, though, this is not the case. If you have a different row gauge or different garment length than written in the pattern, you will need to sort out the correct number of stitches to cast on for your specific project.
To Begin: Calculations
In order to determine the correct ratio of stitches to pick up along a line of rows, you need to know two things: your blocked stitch gauge and your blocked row gauge. I emphasize the “your” here, because there is no point in using the gauge as given in the pattern, as, for a variety of reasons, one or the other may not be accurate.
In my swatch, my stitch gauge is 20 sts per 4″ (or 5 sts per 1″), and my row gauge is 26 rows per 4″ (or 6.5 rows per 1″). In order to evenly pick up stitches along the edge of the swatch – as if I was picking up stitches for a button band along the edge of the front of a cardigan – I need to pick up 20 stitches for every 26 rows of knitting.
It is best to get this fraction, 20/26, down to the smallest numbers possible, which is 10/13. I usually like working with even smaller numbers, though, and want just a 1 number difference between my numerator and denominator, so I’ll break it down even further, to 3/4 + 3/4 + 4/5.

PICK UP AND KNIT HOW TO /
Once you have determined the proper fractions to use, you’ll need to pick up your stitches.
With the right side of your working fabric facing you, insert your needle into the fabric from front to back, wrap your working yarn around the needle as if to knit, and pull it through the fabric.
Important: Make sure you are working along a straight vertical line of stitches, in-between a column of “Vs”, not in the middle of a stitch.
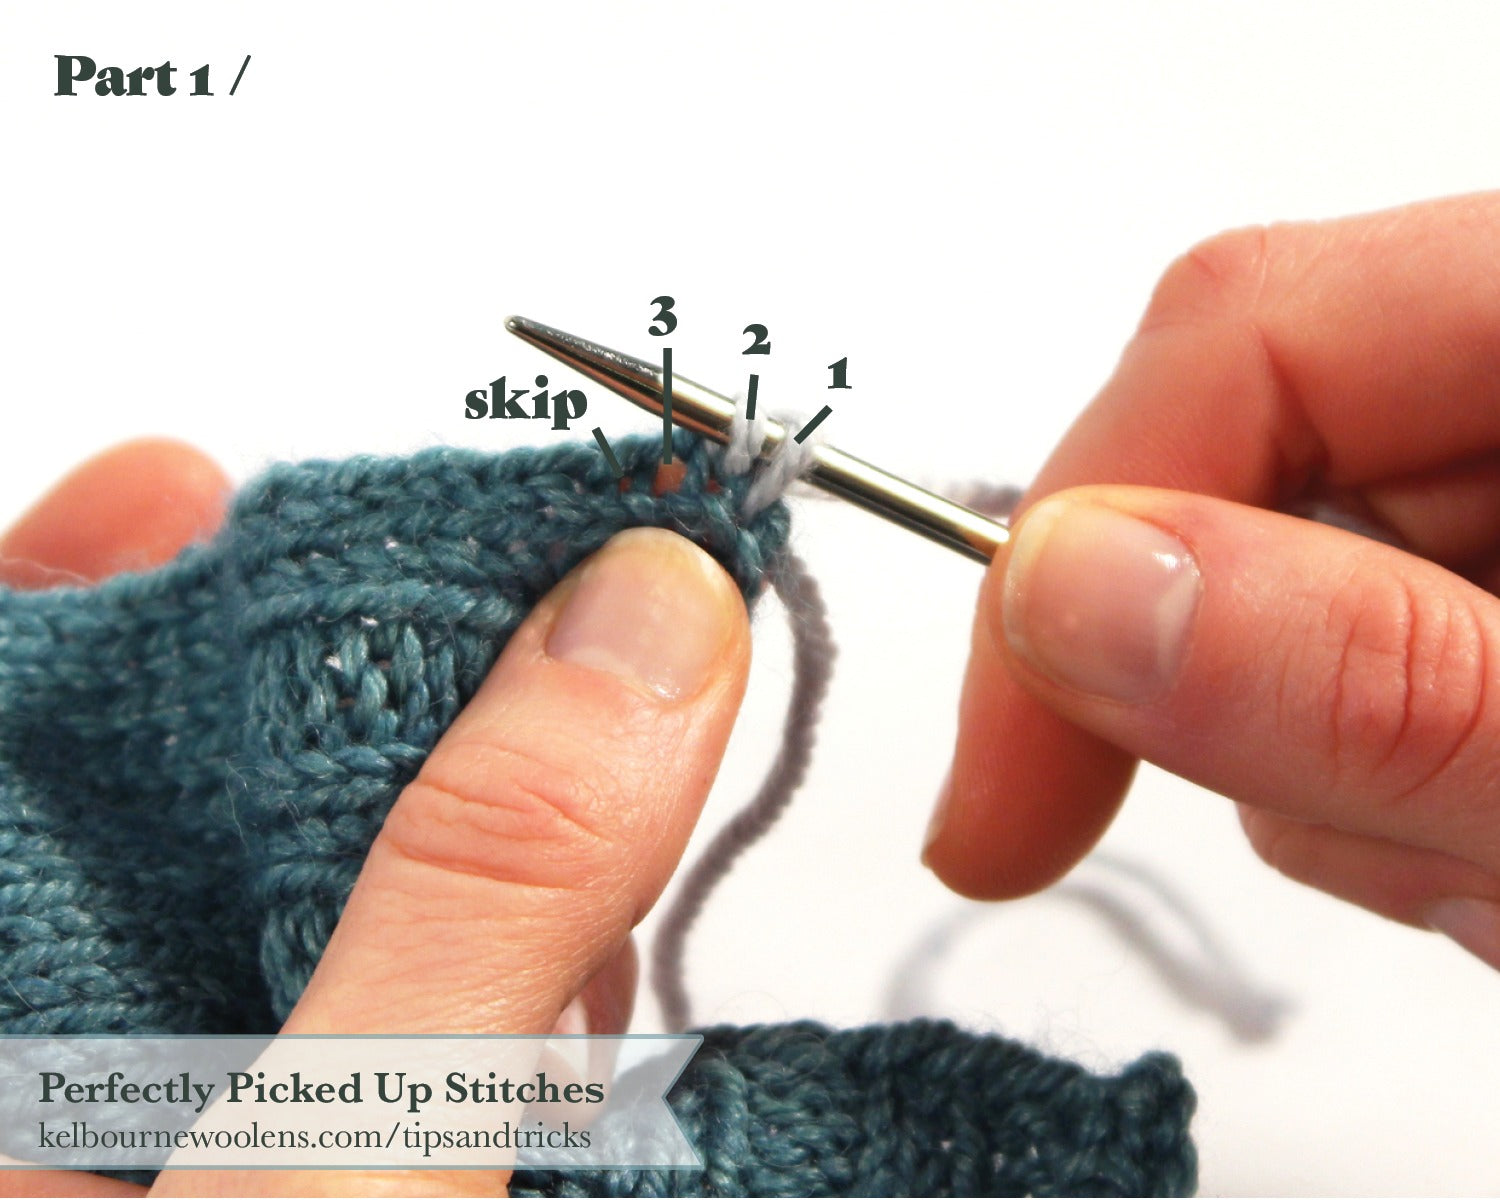
Part 1 / Now that I know these three fractions, I will (pick up 3 stitches for every 4 rows twice, then 4 stitches for every 5 rows once), then repeat this along the full length of my band.

Part 2 / Pick up and knit 3 sts for every 4 rows a second time.

Part 3/ Pick up and knit 4 sts for every 5 rows. 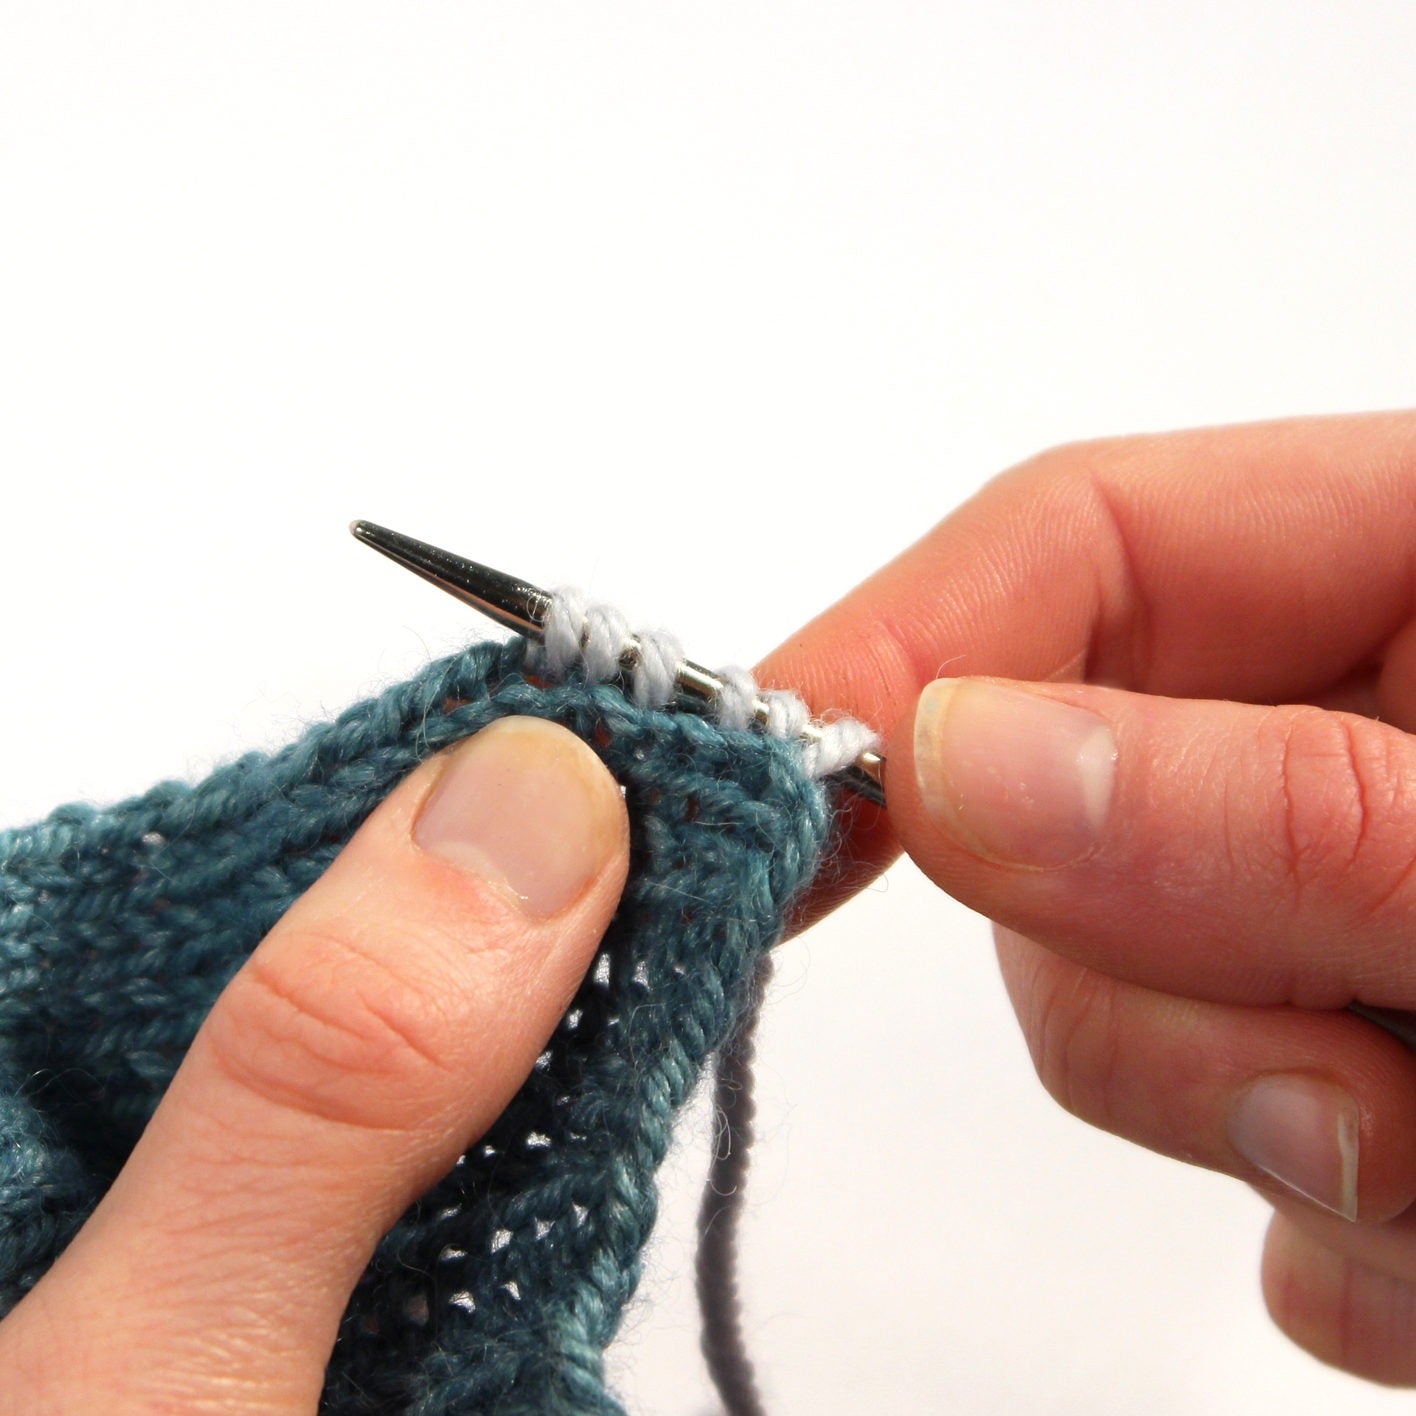
Because I have picked up the correct amount of stitches to occupy 4″ of length, once complete, my button band will lie perfectly flat!
Here are a few other potential examples, and their ratios:
A: 20 stitches and 25 rows / 4″
20/25 can be reduced down to 4/5.
• Pick up 4 stitches for every 5 rows along entire length
B: 18 stitches and 21 rows / 4″
18/21 can be reduced down to 6/7.
• Pick up 6 stitches for every 7 rows along entire length
What if you don’t end up with a nice fraction?
C: 17 stitches and 20 rows / 4″
17/20 cannot be reduced further, so you will need to break it down into smaller fractions as I did in my sample. First divide the numerator into 3 parts: 5, 6, 6. Then, break down the denominator into 3 parts: 6, 7, 7. This makes 3 nice fractions of 5/6, 6/7, and 6/7.
• *Pick up 5 stitches for every 6 rows once, then 6 stitches for every 7 rows twice; repeat from * along the full length of band.
And that’s it! Just a little bit of basic arithmetic, and you’re well on your way to a perfectly picked up button band that lays flat and looks great every time.