Kate
Gillam features a Tuck and Cable patterning that is worked both in the round and flat. The stitch pattern is 6 rounds, with a cable every 6th round, and the tuck stitch worked every 3rd round. As a result, you will work the tuck stitch on both right side and wrong side rows after the armhole division.
Tuck Stitch – Right Side Rows, Worked in the Round and Flat:
Regardless of whether you are working the tuck in the round or flat, the stitch is worked the same on all right side rows:
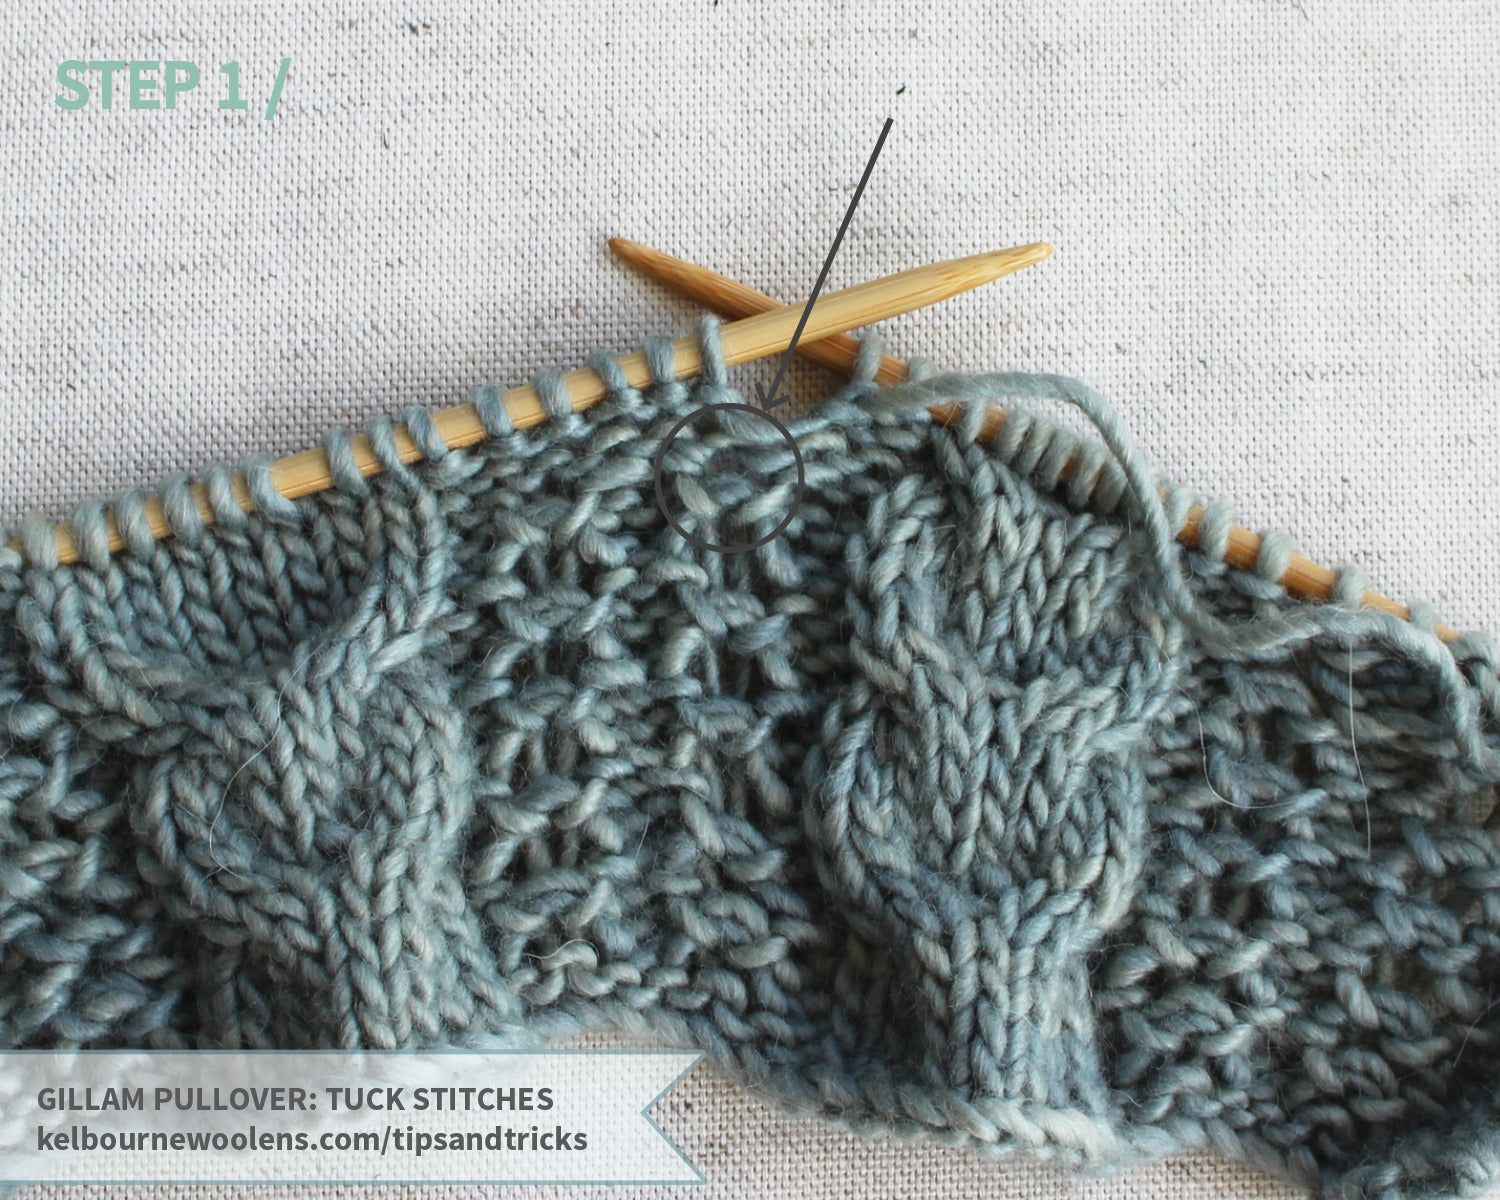
STEP 1 / Once you reach the tuck stitch on the chart, locate the purl stitch two rows below the first stitch on your LH needle. After you have worked a few repeats of the pattern, you may notice that the stitch that you are looking for is the stitch that you worked as the tuck on the previous repeat.
 STEP 2 / With the working yarn in front, insert your right-hand needle into the stitch you’ve identified from back to front in preparation to work a purl stitch. Your needle will be below the left hand needle. Make sure your needle is only through this stitch – do not try to also “catch” the stitch directly above it, or the stitch on the needle.

STEP 3 / Purl the stitch as you would if you were working a regular purl – just pretend the stitch 2 rows below is still on the needle and work it accordingly.

STEP 4 / The final step is where the tuck really happens. By sliding the stitch (and, subsequently, the two below it) off of the left-hand needle, you’re effectively “dropping” them. Since you’ve caught the stitches 2 rows below with the stitch you’ve worked as a purl, the two dropped stitches are held – or, in other words, you’re stopping them at the purl from dropping further. Depending on the stickiness of the fibers, you may need to tug the stitches slightly.
That’s it! This is the way you will work the tuck throughout the whole body. As I mentioned above, though, when working back and forth on the front, you will also be working the tuck stitch on the wrong side of the fabric.
Tuck Stitch – Wrong Side Rows, Worked Flat:

STEP 1 / Once you reach the tuck stitch on the chart, locate the knit stitch two rows below the first stitch on your LH needle. After you have worked a few repeats of the pattern, you may notice that the stitch that you are looking for is the stitch that you worked as the tuck on the previous repeat.

STEP 2 / With the working yarn in back, insert your right-hand needle into the stitch you’ve identified from front to back in preparation to work a knit stitch. Your needle will be below the left hand needle. Make sure your needle is only through this stitch – do not try to also “catch” the stitch directly above it, or the stitch on the needle.

STEP 3 / Knit the stitch as you would if you were working a regular knit – just pretend the stitch 2 rows below is still on the needle and work it accordingly.

STEP 4 / The final step is where the tuck really happens. By sliding the stitch (and, subsequently, the two below it) off of the left-hand needle, you’re effectively “dropping” them. Since you’ve caught the stitches 2 rows below with the stitch you’ve worked as a knit, the two dropped stitches are held – or, in other words, you’re stopping them at the purl from dropping further. As with working on the RS row, depending on the stickiness of the fibers, you may need to tug the stitches slightly.