I can’t remember when I first discovered the beauty of the sloped bind off, but it was most likely when I read something by
Julie Hoover or
Julie Weisenberger - both exceptionally skilled designers and finishers. Once I tried it out, I was hooked, and made a pact with myself to never bind off multiple rows any other way again!
We recommend the sloped bind off when binding off shoulder stitches, shaping necklines, or binding off the top of sleeve caps. When editing the patterns for the
Lucky Tweed Collection, I noticed a few places where the sloped bind off would come in handy, especially on the
Euston tunic, so I figured it was high time to add it to our collection of
Tips and Tricks!
Step 1 / Work the first row of the bind off as normal.
In the case of this swatch, I have 30 stitches, and am binding off 6 stitches on each right side row a total of 5 times, so I bound off 6 stitches and knit to the end.  Step 2a / Work back in your pattern as set until 1 stitch remains,
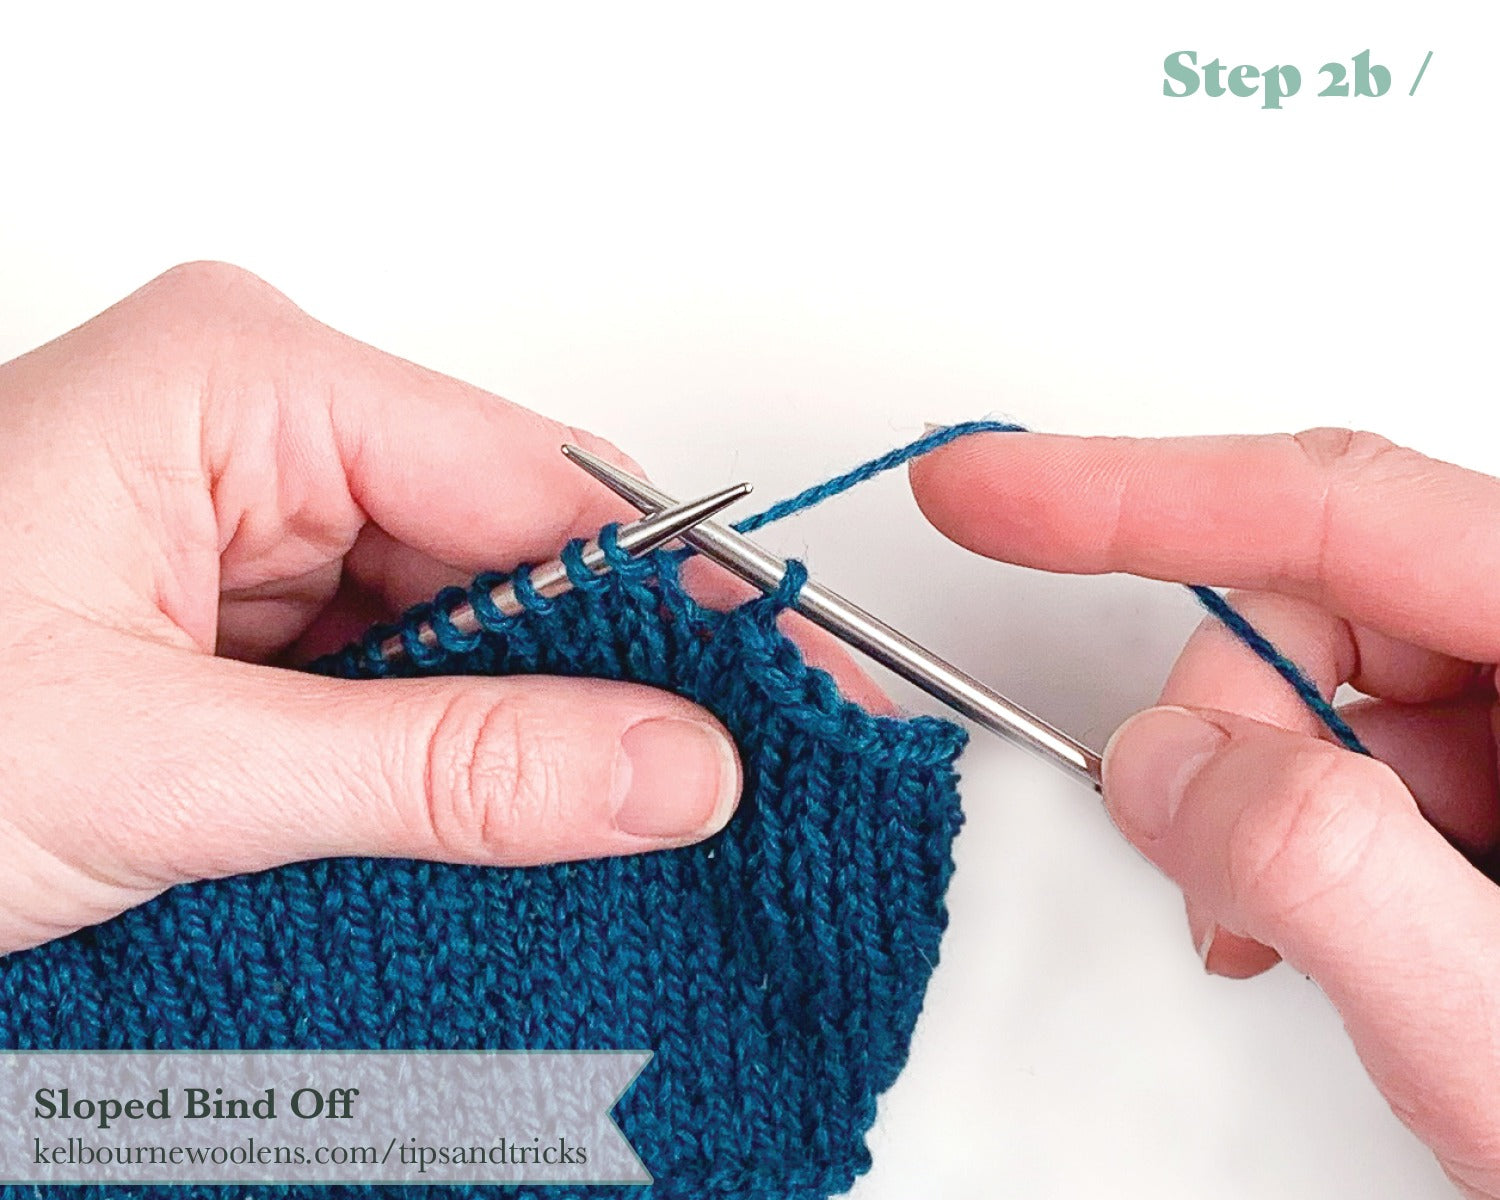
Step 2b / turn - 1 stitch is left unworked on your needle, and is now on the right hand needle.
Step 3 / Slip the first stitch from the left hand needle to the right hand needle as if to purl - there are now two stitches on your right hand needle.
Step 4a / Insert your left hand needle into the unworked stitch (right most stitch on the right hand needle) as if to purl,
Step 4b / and pass it over the just slipped stitch. This counts as one bound-off stitch.
Step 5 / Continue binding off as outlined in the pattern. As mentioned above, I’m binding off 6 stitches at a time, so I will bind off 5
more stitches normally.
Repeat Steps 2-5 until the required number of stitches have been bound off. The end result will be a beautiful slope of stitches in one smooth line.
And that’s it! Pretty simple but an easy way to elevate your knitting and simplify finishing.


 Step 2a / Work back in your pattern as set until 1 stitch remains,


